Finishing Touches

Share

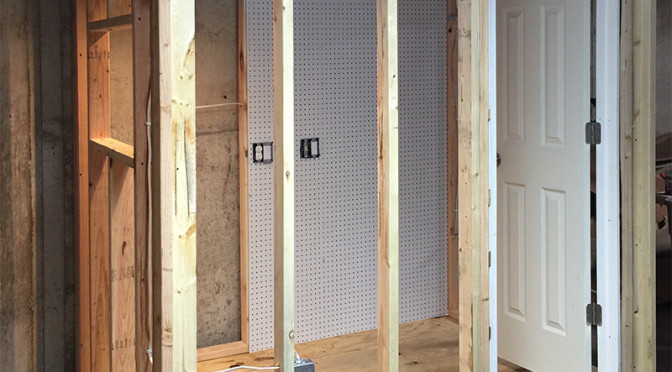
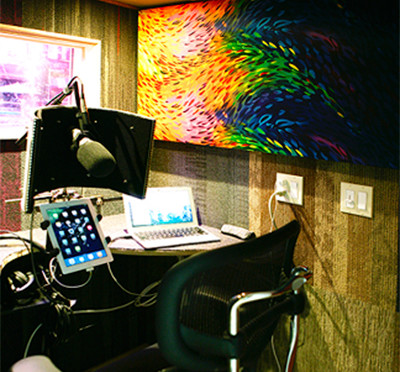
Now for final little touches which make this studio charming from the inside or outside.

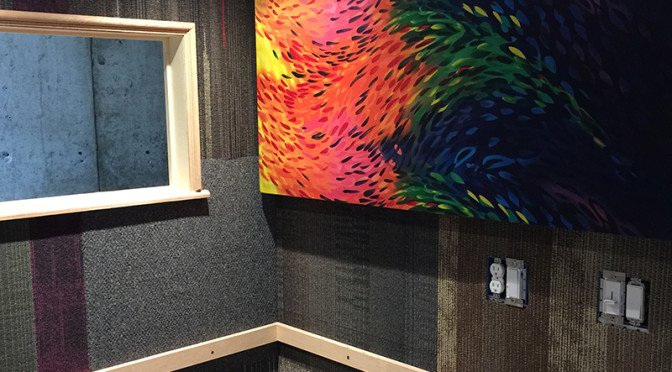
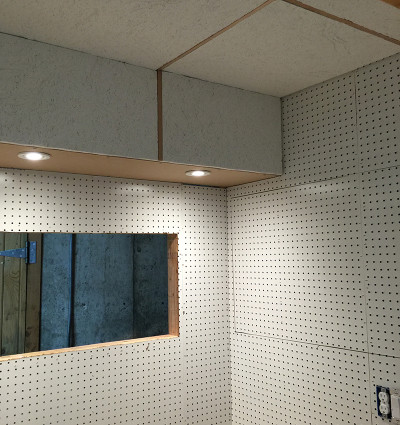
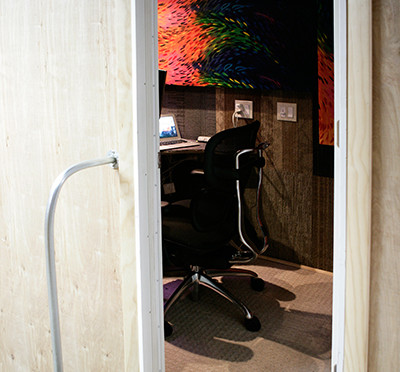
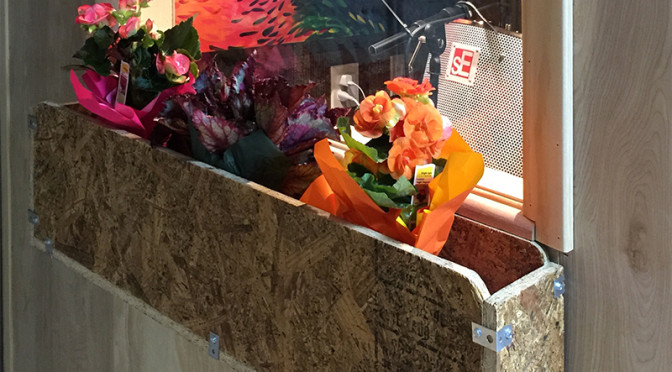
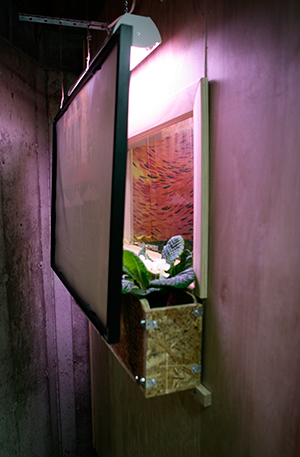
I wanted a pleasant scene, visible from the window since the narrator, or singer, faces that direction. Anything will do, other than a view of grey concrete. I built a small flower box, attached to the outside and then quickly found that I needed a grow light. I added a fluorescent grow light and a changeable view by hanging an inexpensive framed poster on the outside.

studio-26

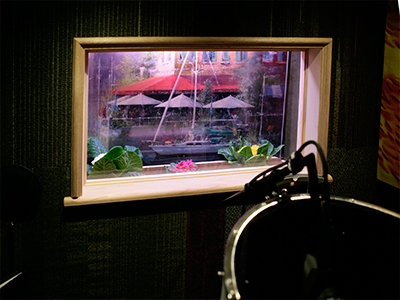
But, its the view from the inside that matters! Now Janel can be in Paris or in the Swiss Alps or anywhere (sort of, at least).

studio-2

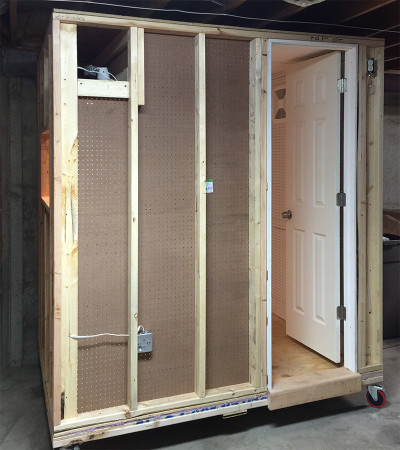
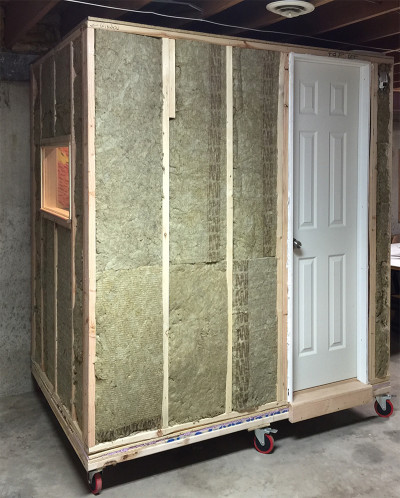
On the exterior, I used 1/4” plywood underlayment, reverse side out, and left it unfinished. Lastly, adding the trim and a small step and hand rail. I used a small night-light on the outside by the door, lit only when the interior lights are on. A signal to not rashly open the door during narration.

studio-29

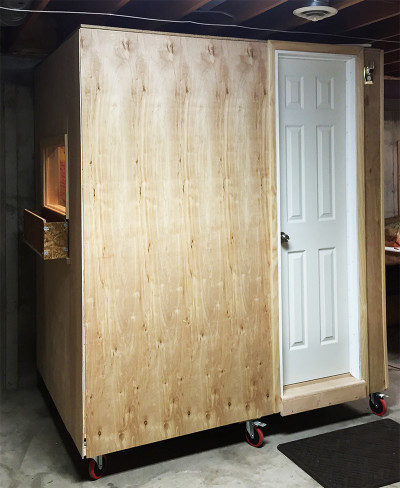
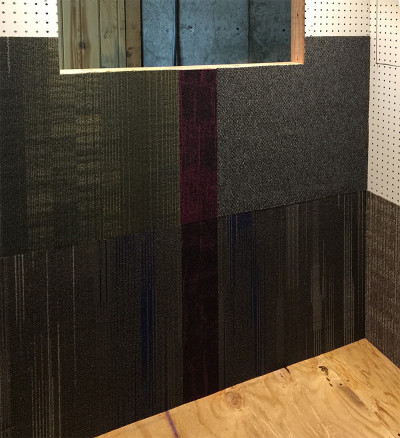
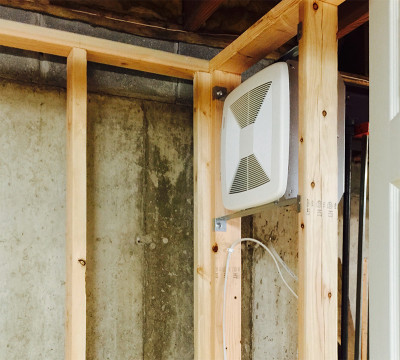
Not pictured is a reverse electrical plug like found in marine hardware suppliers, where power can be supplied via a conventional extension cord. This is mounted on the fan exhaust side of the studio. The last steps were to add a a curved desk top, the carpet underlayment and the carpet.

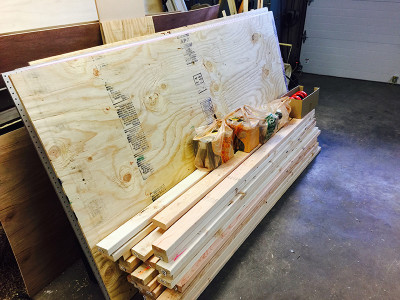
At last, finished! Total cost thus far was under $1000, and that was using new materials. You can do better.

Any regrets? Sure. I should have added more electrical outlets. You can always use more, and I should have included a couple of 1/4” phone jacks for outside communication, just in case. But overall, I’m happy, my narrator is happy and my singer is ecstatic.

Next time, I’ll discuss hardware and software.

Alexander Francis

Absorbing Unwanted Sound

Share

The addition of sound absorbent panels, especially in areas of high reflection, is a long understood concept. There is no reason that your panels should not also be attractive. You may read that the ideal surface to prevent unwanted sound reflection should be matt or rough. Likely true enough. However, a gay, bright, cheerful panel will enliven an otherwise dark and drab interior and the loss of absorbent power is minimal, plus a smooth surface will not attract dust.

studio-19

To built a moveable, yet efficient panel is simple. Start by constructing a frame of 1 x 4 (nominal) pine, braced at the corners and held together with glue and 2” staples. Your piece of insulating fiber should be a tight, close fit all around. I added a simple piece of blue board in the center to prevent bowing inward. Place this assembly on your chosen fabric and staple the edges accordingly. I hung mine using simple, heavy duty picture frame hangers.

studio-20

For the panel needed to cover the ventilation fan, you should notice that the frame is deeper on three sides, allowing air to move under the assembly from the bottom up. An effective but simple trick.

studio-22

Once all the panels are hung, you will notice a dramatic change in the room sound reflection.

studio-4

Don’t forget the door, which badly needs some acoustic deadening, Also, you should be meticulous with the weather stripping around it from top to bottom. No light should be seen around the door when it is closed. If you can see light, you can hear sound. I covered the door with foam panels, attached by spray-on adhesive.

studio-23

And of course the ceiling. I used a thick, drop-in style of acoustical tile (which has high ratings for sound absorption), used contact adhesive to mount them, and trimmed out with stained pine. Above and behind the tile is additional sound absorbent insulation.


Next up will be finishing touches.
Alexander Francis

Completing the Walls

Share

Once the frame was up, I elected to sheath the interior with perforated pegboard prior to any wall finish or insulation. Peg board is inexpensive and there are plausible arguments around which give an edge to a perforated surface because it breaks sound waves differently than a flat surface. The door was inexpensive but solid, not hollow. A hollow door will act as a drum surface and amplify sound

.studio-16

Some finishing touches were added at this time, such as a threshold and the electrical. I chose LED recessed lights because of their lack of additional heat buildup in our enclosed structure. One reason for the choice of a below ground level location was the cooling effect of the surrounding concrete, avoiding the necessity of any active cooling other than a fan.

studio-15

You can see that we have added a window, positioned just in front of the microphone location. A window allows communication with the occupant of the studio but also can add a significant visual interest, as you will see later. Any sound escaping past the absorbent barrier behind the microphone will be reflected toward the rear and absorbed by large panels on the rear wall. Yes, a better design is to avoid any flat reflective surfaces such as are found in a rectangular design like this one. However, this design is easier to construct, cheaper and works very well as it is. The next step is to provide an absorbent but attractive interior. Tile squares are inexpensive and may be mounted by contact adhesive. Some cutting is required but the work goes quickly.

studio-17

The next step is to isolate the booth by using sound absorbent insulation on the walls, placed from the outside. I chose Roxul Safe’n Sound in 2’x4’ by 3”. Four bags were enough to insulate all the external walls and to construct several interior sound absorbent panels, to be described in another blog.

studio-18

studio-24

More later,

Alexander Francis

Beginning

Share

I started my project with an idea to build a small studio just large enough to accommodate a seated narrator or singer but also to allow a standing musician, two, or even an assistant. I’ve had as many as five people at one time in this small space, but I wouldn’t recommend it.

Given my criteria, I gauged that a 5’ by 7’ floor plan would suffice. The height would be as close to room size as I could allow. I was fortunate that my allocated area had rather high ceilings. A trip to a big box lumber and hardware store, and I had my start.

studio-6

I decided on a plywood sandwich for the floor using inexpensive 1/2” underlayment with insulating blue board in-between, supported by a 2 by 4 frame.

studio-7


studio-10

Later, the floor will be covered by a thick carpet pad under a plush carpet. Once the floor assembly was completed, I added heavy duty castors. One mistake I made was to not use three castors on the long sides, an error I eventually corrected.

Next, I assembled the frame using standard construction techniques, as seen in the following photograph.

studio-11

One area deserving mention is the ventilation fan. I obtained a multi-speed, ultra-quiet fan and mounted it on the rear wall. As you shall see, the fan will be covered by a thick, sound deadening unit absorbing any sound from the fan or the exterior of the sound booth but allowing ventilation to flow under the sound barrier via a slot in its lower board.

studio-13

More to follow.
Alexander Francis

Building Your Own Sound Booth

Share

Building your own sound booth is possible. I make that statement after recently creating one. My goals were to have a convenient, high quality and attractive booth for narration of my novels. Other uses have happily emerged, such as recording a singer’s voice over a provided melody, to be modified later in a digital audio workstation where additional tracks are created and modified. It turns out that this little studio is nearly perfect for both tasks. In this multi-part blog, we will focus on the narration.

A narrator will spend many hours in the booth you create. I have seen, as I’m sure you also have, the use of closet space, complete with hanging clothes to deaden sound. Or the opposite: a full room of foam, walls and ceiling, where no reflected sound is possible. Between those two extremes seems to be an area of compromise where a quality sound can be recorded in a pleasant and suitably sized package.

Mood is important…and happiness is reflected in a recording booth the same as sound waves. Where possible, we need to make the narrator (or singer) feel surrounded by the energy of comfort, visually and otherwise. It will surely pay dividends in what is laid down on the track.

My situation might be somewhat unique in that I chose to build a moveable booth in a corner of a semi-industrial facility. My booth can be moved accordingly, if necessary. However, there was no compromise in making it both attractive and remarkably dead to outside sounds, as long as no active work was taking place outside of the booth at the time of recording.

This little booth has good ventilation, good lighting and a little trick of my own design to make it seem that the narrator is someplace other than a concrete walled enclosure.

To start, I dedicated myself to an extensive search of the Internet regarding construction of a sound booth. The results were a vast array of differing opinions and techniques. One concept that I came away with was that the recording studio should not be dead flat. Every echo, every live sound, should not be removed. To do so is both expensive and unnecessary. Aren’t our ears used to hearing some sound along with the human voice? Is it necessary to have the perception that the speaker is someplace in outer space? I say no…and so do others. Therefore, some items in your booth can reflect sound and still the recording will be successful. You can’t, however, avoid controlling unwanted echoes which will bounce around in an unpredictable manner unless you take the necessary steps to absorb those reflections.

I am going to discuss the construction of this booth from the ground up, or at least from the floor up. Following blogs will discuss my selection of recording equipment.  There is no unique, perfect solution and many combinations of hardware and software will do as well if not better than the ones I selected.  But I must say that my choices work well for me and I am very happy thus far. At some future date I will include a discussion about the DAW (Logic Pro X) I use.  I don’t claim to be a sound engineer or even a moderate expert, but I will share what I have learned.

Alexander  Francis